If you have spent any time on home design social media lately, you have definitely seen board and batten. It is everywhere, and for good reason. This classic wall treatment, originally used on barns and farmhouses to seal wooden planks, has evolved into one of the most requested interior design features of the past few years. The look is simple but striking: wide vertical boards spaced evenly across a wall, with narrow battens covering the seams. But here is the problem that most people discover. Cutting and installing all those vertical strips by hand is tedious, and getting the spacing perfectly even across an entire wall requires advanced math skills and a lot of patience. That is where a board and batten wall molding kit changes everything. Instead of measuring and cutting each batten individually, you receive pre-cut vertical pieces designed to fit a specific wall width. You also get spacers or a layout guide that guarantees perfect uniformity. The result is that signature farmhouse-meets-modern look, achieved in a fraction of the time and with none of the frustration.
Why Board and Batten Creates Such a Dramatic Feature Wall
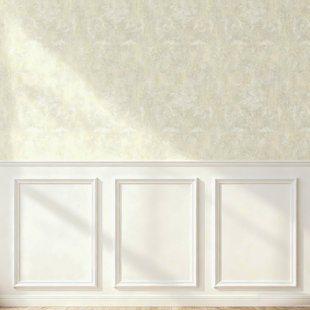
Let me explain the visual appeal because it is genuinely unique compared to other molding styles. Where picture frame molding adds horizontal and rectangular patterns, board and batten is all about verticality. Those long, uninterrupted lines draw the eye upward, making ceilings appear significantly higher than they really are. This is a game changer for rooms that feel a little squat or cramped. The shadows cast by the raised battens also create a rhythm across the wall, a steady beat of light and dark that your brain finds deeply satisfying. Unlike wainscoting, which typically only covers the lower third of a wall, board and batten can run from floor to ceiling for a dramatic, floor-to-sky effect, or stop at chair rail height for a more traditional, grounded look. The style is also incredibly versatile. Paint everything white for a classic farmhouse feel, go dark charcoal for moody modern drama, or choose a soft sage green for a cottage vibe. No matter your color choice, the vertical lines do the heavy lifting of making the wall feel intentional and designed.
Choosing Between Traditional, Modern, and Hybrid Styles
Not all board and batten looks the same, and the kit you choose should match your home's personality. Traditional board and batten uses wider boards, often six to eight inches wide, with narrow battens around one to two inches wide covering the gaps. This version feels rustic, sturdy, and historical, perfect for farmhouses, country cottages, or any home with exposed beams and vintage furniture. Modern board and batten flips the proportions. The boards become narrow, sometimes just three or four inches wide, and the spacing between them grows wider. This creates a cleaner, more minimalist look that feels right at home in contemporary lofts and mid-century houses. There is also a hybrid style sometimes called "false board and batten" where you skip the wide background boards entirely and simply attach narrow battens directly to the existing drywall. This is the most common approach for DIY kits because it adds texture without consuming any floor space. The gaps between battens become the "boards," and you paint the entire wall, battens and all, the same color. The result is the look of board and batten with half the material cost and none of the bulk.
What a Typical Kit Includes and How It Simplifies Layout
Open a board and batten kit, and you will immediately appreciate how much thought went into saving you from math. The kit contains all the vertical battens pre-cut to the same height, usually matching a standard eight or nine-foot ceiling. You will also receive horizontal rails if your design includes a top and bottom cap piece, which many kits do for a finished look. The true genius is the included spacing guide. This might be a physical plastic template with pre-set gaps, a roll of alignment tape with marks every few inches, or a simple formula card that tells you exactly where to place each batten based on your wall width. Some premium kits even include self-adhesive battens with peel and stick backing, so you do not need glue or nails. You also typically get a level, a tube of construction adhesive, and a small sanding block. With these tools, the layout process becomes almost automatic. You mark your starting point at the wall's center, place the first batten, use the spacer to position the next one, and repeat. No measuring, no recalculating, no ending up with an awkward narrow gap at the corner.
Step by Step Installation from Blank Wall to Finished Feature
Let me walk you through how a weekend warrior completes a board and batten feature wall. First, you clear the wall and clean it thoroughly. Remove any outlet covers and light switch plates. Second, you decide on your layout. Most designers recommend starting at the center of the wall and working outward so the gaps at the two ends are equal. Use your level to draw a faint vertical pencil line at the center. Third, you apply adhesive to the back of your first batten and press it along that center line, using your level to ensure it is perfectly straight. Fourth, you take your spacing guide and place it against the first batten, then install the second batten against the other side of the guide. Repeat across the entire wall. Fifth, if your kit includes top and bottom horizontal rails, you install those after all vertical battens are up, running them continuously across the top and bottom of your battens. Finally, you let the adhesive cure, fill any small gaps with paintable caulk, sand lightly, and apply two coats of paint. The entire process typically takes four to six hours, and the transformation is immediate.
Where to Install Board and Batten for Maximum Impact
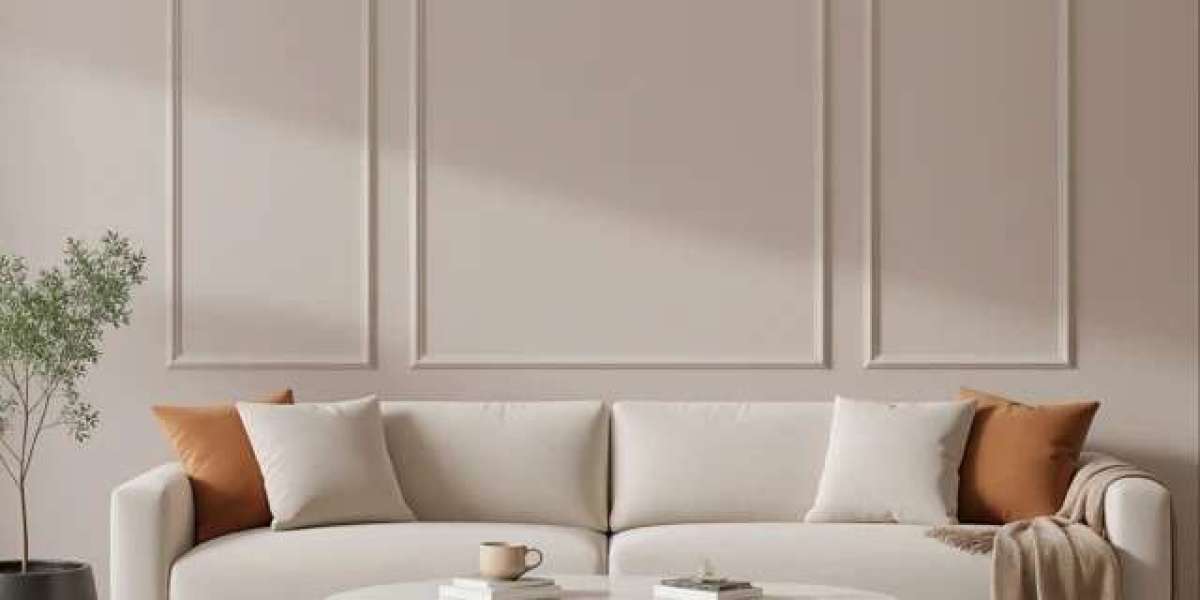
You could put board and batten on every wall in your house, but a single well-placed feature wall often delivers more drama. The wall behind your bed in the master bedroom is a classic choice. The vertical lines create a stunning headboard effect without the cost of an actual headboard. In a dining room, install board and batten on the wall where your buffet or sideboard sits. The texture will make your table settings and artwork stand out beautifully. For a home office, the wall behind your desk becomes an instant statement piece that impresses on video calls. Children's rooms also benefit from board and batten, especially when painted a cheerful color like soft blue or blush pink. The vertical battens also provide subtle protection against bumps and scuffs from toys and furniture. Even narrow hallways and entryways are perfect candidates. The vertical lines actually make these tight spaces feel longer and less tunnel-like. Avoid placing board and batten in bathrooms with poor ventilation, as excessive moisture can eventually affect even moisture-resistant materials if the room never fully dries out.
Painting and Styling Your New Feature Wall
The paint color you choose for your board and batten wall molding kit completely changes its personality. For a subtle, textural look that feels architectural rather than bold, paint the battens and the wall the exact same color. This approach lets the shadows created by the raised battens do all the talking. For a more dramatic statement, paint the wall a lighter color and the battens a darker shade, or vice versa. A deep navy wall with crisp white battens creates striking contrast that feels both classic and modern. If you really want to lean into the farmhouse aesthetic, leave the battens white and paint the wall a soft greige or sage green. Once your paint is dry, style the wall thoughtfully. Lean a large mirror or piece of artwork against the wall rather than hanging it, so the vertical battens remain visible. Place a narrow console table or bench below to ground the composition. Add a tall floor lamp or a potted plant to echo the vertical lines of the battens. The goal is to complement the wall without covering it up. With a board and batten wall molding kit, you have created a stylish feature wall that will draw compliments for years to come, and you did it in a single weekend without any advanced carpentry skills.