Laser hair removal has become one of the most sought-after aesthetic treatments in Delhi, offering a long-term solution to unwanted body and facial hair. In a city where pollution, hectic lifestyles, and cultural preferences for smooth skin drive demand, clinics across South Delhi, West Delhi, and NCR areas report high footfall for this procedure. Unlike traditional methods like waxing, shaving, or threading—which provide only temporary relief—laser hair removal targets the root of the problem by damaging hair follicles, leading to significant and lasting reduction in hair growth.
This informative guide breaks down the entire step-by-step process of laser hair removal in Delhi, from initial consultation to aftercare. Whether you’re considering underarms, full legs, bikini area, or full-body packages, understanding the procedure helps set realistic expectations and ensures safer, better results.
Understanding How Laser Hair Removal Works
Laser hair removal operates on the principle of selective photothermolysis. A concentrated beam of light (laser) is absorbed by the melanin (pigment) in the hair shaft and follicle. This light energy converts into heat, which damages the follicle enough to inhibit or delay future hair growth, without significantly harming the surrounding skin.
Hair grows in three phases: anagen (active growth), catagen (transitional), and telogen (resting). Lasers are most effective during the anagen phase when the follicle is rich in melanin. Since not all hairs are in the same phase at once, multiple sessions are necessary.
In Delhi’s diverse population, skin types typically range from Fitzpatrick III to VI (medium to darker tones). This makes laser selection critical. Common technologies include:
- Diode Laser (800-810 nm): Versatile, relatively fast, and suitable for a wide range of skin and hair types. Often preferred for Indian skin.
- Nd:YAG Laser (1064 nm): Longest wavelength, safest for darker skin tones as it penetrates deeper with less risk to epidermal melanin. Ideal for tanned or Type V-VI skin common in North India.
- Alexandrite Laser (755 nm): Highly effective for lighter skin and finer hair but used cautiously or in combination for Indian complexions.
- Triple Wavelength or Combination Lasers (e.g., Soprano Titanium): Many premium Delhi clinics use devices combining Alexandrite, Diode, and Nd:YAG for optimal efficacy and safety across skin types.
Modern machines often feature built-in cooling systems (sapphire tips, cryogen spray, or vacuum-assisted) to minimize discomfort.
Step 1: Consultation and Skin Assessment
The journey begins with a detailed consultation at a reputable clinic. A qualified dermatologist or trained laser technician reviews your medical history, skin type, hair color/thickness, hormonal status (PCOS or thyroid issues are common in Delhi patients), medications, and expectations.
They perform a patch test on a small area to determine the appropriate laser settings and check for adverse reactions. This step is crucial for Indian skin to avoid burns or pigmentation issues.
During consultation, discuss:
- Realistic outcomes: 70-90% hair reduction after a full course, not complete permanent removal for everyone.
- Number of sessions: Typically 6-8 for body areas; 8-12 for facial or hormonal zones. Sessions are spaced 4-6 weeks apart for face and 6-8 weeks for body.
- Cost in Delhi: Prices vary widely. Small areas (upper lip) start at ₹1,500-3,000 per session; underarms ₹2,500-5,000; full legs ₹10,000-20,000; full body packages ₹25,000-50,000 or more per session. Packages for 6-8 sessions often offer discounts. Factors include clinic location (South Delhi premium clinics charge more), technology, and doctor expertise.
Choose clinics with US FDA-approved machines, experienced dermatologists, and good hygiene standards. Look for before-after photos of similar skin types.
Step 2: Pre-Treatment Preparation
Proper preparation maximizes results and minimizes risks:
- Avoid sun exposure and tanning: No direct sun, tanning beds, or self-tanners for at least 2-4 weeks (ideally 6 weeks) before treatment. Tanned skin increases burn risk.
- Stop waxing, plucking, or threading: For 4-6 weeks prior and between sessions. These remove the hair root, which the laser needs to target. Shaving is allowed and recommended.
- Shave the area: Shave 24-48 hours before the session so hair is short (stubble) but follicles remain intact. Do not shave on the day if skin is irritated.
- Avoid photosensitive products: Skip retinoids, AHAs, BHAs, or certain antibiotics for a few days as advised.
- Clean skin: Arrive with clean, makeup-free, lotion-free skin in the treatment area.
- Inform about medications: Certain drugs (e.g., isotretinoin) may require delaying treatment.
In Delhi’s hot and humid climate, patients should also avoid excessive sweating or outdoor activities right before sessions.
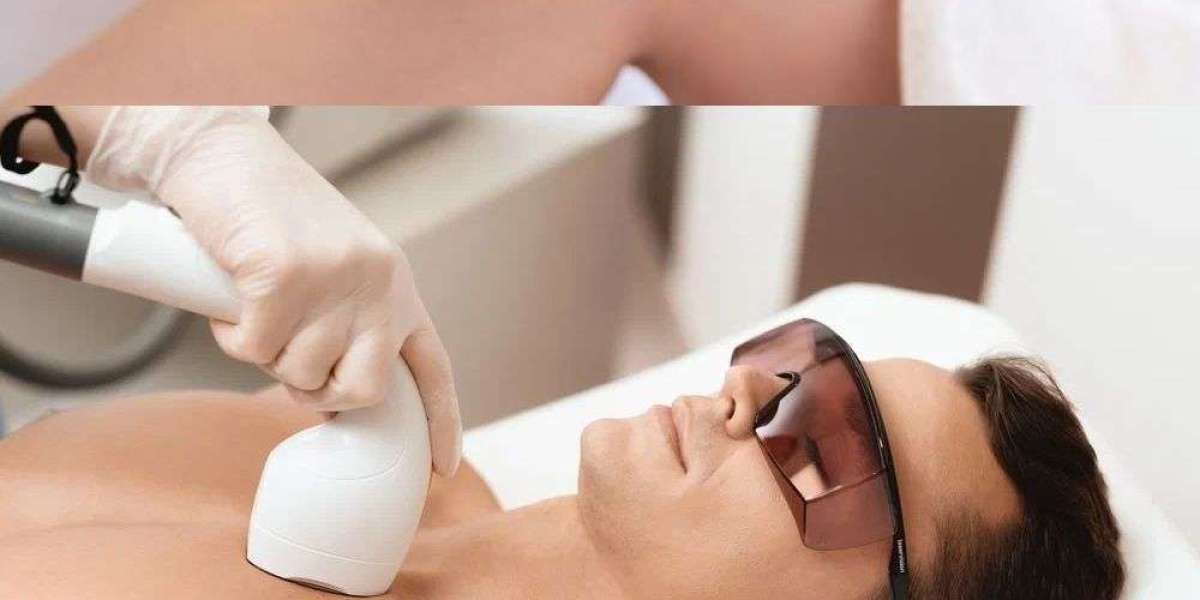
Step 3: The Treatment Session – What Happens on the Day
On the day of your appointment:
- Check-in and consent: Review any last-minute questions and sign consent forms.
- Skin preparation: The technician cleans the area thoroughly to remove oils, sweat, or residues.
- Protective measures: Both you and the practitioner wear special laser safety goggles to protect eyes from the intense light.
- Cooling gel or device: A cooling gel may be applied, or the machine’s contact cooling is used throughout.
- Laser application: The handheld device is placed on the skin. Pulses of laser light are delivered in a grid-like pattern. You may feel a snapping sensation like a rubber band, mild warmth, or tingling. Advanced cooling makes it tolerable for most; numbing cream is optional for sensitive areas like the upper lip or bikini.
- Session duration: Upper lip – a few minutes; full legs or back – 30-60 minutes; full body – up to 90+ minutes.
- You might smell singed hair – completely normal as the laser targets the pigment.
- Post-pulse care: The area is cooled again, and soothing aloe or calming lotion may be applied.
Most people describe the discomfort as manageable, far less painful than waxing for many.
Step 4: Immediate Aftercare and Recovery
There is minimal downtime, but your skin may appear slightly red or swollen (like mild sunburn) for a few hours to a day.
Do’s after treatment:
- Apply cool compresses or aloe vera gel to soothe.
- Use fragrance-free moisturizer.
- Wear loose clothing to avoid friction.
- Apply broad-spectrum sunscreen (SPF 30+) religiously if going outdoors.
Don’ts for 24-48 hours:
- No hot showers, saunas, steam, or intense exercise (avoid sweating).
- No swimming or harsh scrubbing.
- Avoid retinoids, acids, or irritants for a few days.
Hair does not fall out immediately. It sheds gradually over 1-3 weeks as damaged follicles release the hair. Do not pluck shedding hair—let it fall naturally.
Subsequent sessions are scheduled based on the area and hair regrowth pattern. With each session, hair grows back finer, lighter, and sparser.
Expected Results and Timeline
- After 2-3 sessions: Noticeable thinning and slower regrowth.
- After 6-8 sessions: 70-90% reduction in most cases. Maintenance sessions (once or twice a year) may be needed for hormonal areas.
- Results last years for many, though individual factors like hormones, genetics, and age play a role. Dark, coarse hair responds best; fine or light-colored hair may need more sessions or different settings.
In Delhi, patients often combine treatments with skincare routines to manage pigmentation or dryness post-monsoon or winter.
Potential Side Effects and Safety Considerations
When performed by trained professionals with appropriate lasers, side effects are usually mild and temporary:
- Redness, swelling, or perifollicular edema (resolves in hours/days).
- Temporary pigmentation changes (hyper or hypo-pigmentation), more common if sun protection is ignored.
Rare risks include blisters, scarring, or infection—almost always linked to poor technique or unqualified providers. For Indian skin, Nd:YAG or diode lasers with proper fluence settings minimize risks significantly.
Always choose clinics registered with relevant authorities and run by dermatologists, not just beauty technicians. Delhi has many high-end options in areas like Greater Kailash, Defence Colony, and Gurgaon that prioritize safety.
Why Delhi is a Great Place for Laser Hair Removal
Delhi offers a mix of advanced technology and competitive pricing compared to Western countries. Many clinics import latest machines from the US, Israel, or Europe. The high volume of treatments also means experienced hands. However, do thorough research—read reviews, verify doctor credentials, and avoid suspiciously cheap offers that may compromise on machine quality or hygiene.
Final Tips for Best Results in Delhi
- Start treatments in cooler months (October-March) when sun exposure is lower.
- Maintain consistency with session intervals.
- Combine with a healthy lifestyle to manage any underlying hormonal issues.
- Invest in quality sunscreen and gentle skincare year-round.
Laser hair removal in Delhi can be life-changing—freeing up time from endless salon visits and boosting confidence with smoother skin. By following the proper step-by-step process, preparing well, and choosing the right clinic, you can achieve safe, effective, and satisfying long-term hair reduction.
If you’re ready to begin, book a consultation with a board-certified dermatologist. Discuss your specific skin and hair profile to get a personalized plan tailored for Delhi’s climate and your needs.