Understanding Cap Embroidery Digitizing
custom cap embroidery digitizing is one of the most challenging forms of machine stitching due to the curved surface, structured panels, and limited stitching space. A properly prepared embroidery file determines whether the final design appears clean or distorted. Many businesses face issues like uneven stitching, broken threads, or misaligned logos simply because the digitizing stage was not handled correctly.
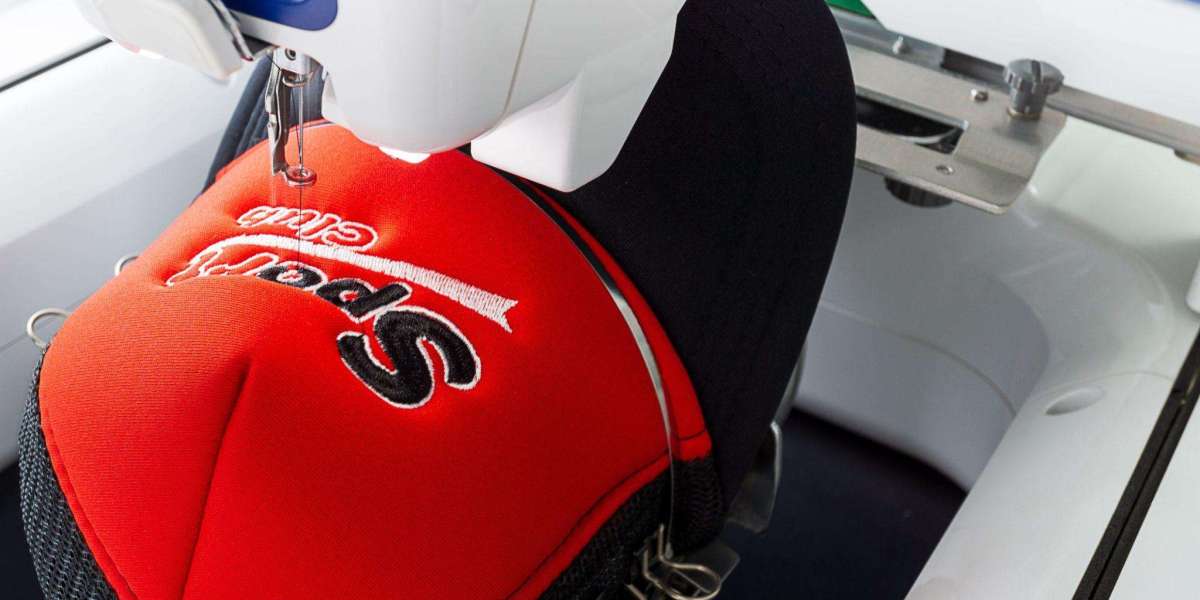
In embroidery production, digitizing is the process of converting artwork into a machine-readable stitch file. This file tells the embroidery machine where to place stitches, what type of stitch to use, and how dense the design should be. When working with caps, this process becomes more technical because the curvature affects how stitches behave on fabric.
A common problem beginners face is assuming that any logo file can be directly stitched. However, embroidery machines do not read images; they follow stitch commands created during digitizing. Without proper adjustment for cap structure, even high-resolution logos can turn into poor-quality embroidery.
Why Cap Embroidery Requires Special Attention
Caps are not flat surfaces. They are typically made of structured panels with seams, buckram backing, and a curved front. This creates limitations in stitch direction and density. If a design is not adjusted for these conditions, distortion is almost guaranteed.
Another issue is hooping. Caps require specialized hoops that hold the material in a fixed curved position. If the stitch file is not aligned with this hooping method, designs may shift during production. This leads to misaligned text, uneven spacing, or designs that appear stretched.
Thread breakage is another frequent issue. This happens when stitch density is too high or underlay is not properly set. Proper digitizing ensures that the machine runs smoothly without unnecessary stops, which improves production efficiency and reduces waste.
Common Problems in Cap Embroidery Production
One of the biggest challenges is logo distortion. Circular logos often appear oval, and straight text can become curved unintentionally. This happens when stitch angles are not adjusted for cap curvature.
Another issue is poor readability. Small text becomes unreadable when stitch density is too heavy or too light. Designers often underestimate how thread behaves compared to digital pixels.
Registration errors are also common. This occurs when different parts of a design do not align properly. For example, outlines may not match filled areas, creating gaps or overlaps.
Lastly, production inconsistency can occur when the same design is stitched on different machines. If the file is not optimized for standard settings, results may vary across production runs.
How Proper Digitizing Solves These Issues
A well-prepared embroidery file takes into account fabric type, stitch direction, and machine limitations. Underlay stitches are used to stabilize fabric before the main design is stitched. This prevents shifting and improves clarity.
Stitch density is carefully adjusted to avoid thread buildup. Too many stitches can damage fabric, while too few can make the design look weak. Balance is essential for durability and appearance.
Pull compensation is another important factor. It compensates for fabric tension caused during stitching, ensuring shapes remain accurate after embroidery is completed.
For caps, special attention is given to center alignment and stitch direction flow. This ensures the design follows the natural curve of the hat, reducing distortion and improving visual appeal.
Best Practices for High-Quality Cap Embroidery Output
To achieve professional results, designers should always start with clean vector artwork. Raster images often require redrawing before digitizing can begin. Simple, bold designs work better than overly detailed artwork.
Font selection also matters. Thick, sans-serif fonts are more readable when stitched on caps. Thin or decorative fonts often lose clarity during production.
Testing is another critical step. Running a sample stitch-out before full production helps identify issues early. This reduces material waste and prevents large-scale errors.
Machine settings should also be standardized across production. Consistency in tension, speed, and thread type ensures uniform output.
Choosing the Right Approach for Business Use
Businesses that rely on cap embroidery should prioritize consistency and scalability. Poor digitizing can lead to customer dissatisfaction and increased production costs. On the other hand, well-optimized files improve turnaround time and reduce machine downtime.
Outsourcing to experienced digitizers is often a practical solution for companies that do not have in-house expertise. Skilled professionals understand stitch behavior, fabric limitations, and machine compatibility.
For growing brands, investing in quality digitizing is more cost-effective than repeatedly correcting production errors. It improves brand image by ensuring logos always appear sharp and professional.
Final Thoughts
Cap embroidery is not just about stitching a logo; it is a technical process that requires precision at the digital level. When digitizing is done correctly, production becomes smoother, faster, and more reliable. Most embroidery issues can be traced back to poor file preparation rather than machine error.
Understanding how stitch files interact with curved surfaces is essential for achieving consistent results. With proper planning, testing, and adjustment, businesses can avoid common mistakes and produce high-quality embroidered caps at scale.