You have a design in mind and a Singer or other compatible embroidery machine waiting, but you need that design in the .XXX embroidery file format. Professional digitizing services can cost per design, and as a hobbyist or someone just starting a small business, those fees add up quickly. The desire to Digitize XXX Embroidery Files for Free is powerful, but the real goal is to achieve clean stitching—results that look professional, not homemade. While "free" and "professional-quality" are often at odds, it is possible to create very good XXX files at no cost if you use the right tools, follow a meticulous process, and manage your expectations. This guide will walk you through the legitimate free methods, the critical steps for clean stitching, and the mindset needed to turn your ideas into beautiful embroidery without a software budget.
Understanding the Real Challenge: It's Engineering, Not Art
First, let's clarify the task. Digitizing is not tracing. It's the process of engineering a stitch file. Your machine's .XXX file is a set of commands: needle down here, stitch this long, jump here, change color. Clean stitching is the result of a well-engineered file. Poor stitching—puckering, thread breaks, blurry details—is the result of a poorly engineered file. Free tools can give you the blueprint, but you have to be the engineer.
Method 1: The Free Powerhouse - Ink/Stitch with Inkscape
This is the most capable truly free method and an excellent platform for learning core digitizing principles. It requires a learning investment, not a financial one.
Step-by-Step to Your First XXX File:
Install the Free Tools: Download and install Inkscape (a free, open-source vector graphics program). Then, install the Ink/Stitch extension (full instructions are on the Ink/Stitch website).
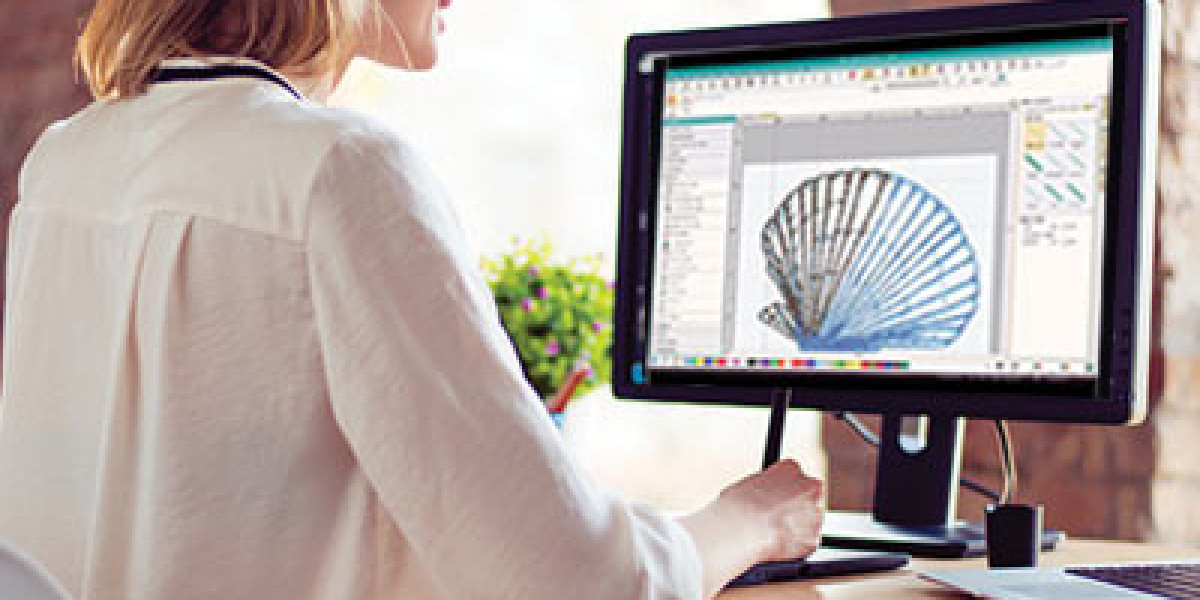
Create or Import Your Design in Inkscape:
For a New Design: Use Inkscape's tools to draw simple shapes and text. Remember, complex designs are hard to digitize cleanly for free.
For an Existing Image: Import a PNG/JPG. Use the Trace Bitmap tool (Path > Trace Bitmap) to convert it into a vector path. This is crucial—you must work with vectors, not pixels. Simplify the path as much as possible.
The Digitizing Phase - Where Clean Stitching Starts:
Select your vector object.
Go to
Extensions > Ink/Stitch > Params.Assign Stitch Types: This is your first engineering choice.
Use "Fill" for large solid areas. Immediately adjust the density. For clean stitching on most fabrics, start with a fill density between 0.35mm and 0.45mm. This prevents a stiff, puckered look.
Use "Satin Column" for borders, text, and lines. Adjust the default width—satin stitches look clean when they are an appropriate width for the element.
Use "Running Stitch" for very fine details or manual underlay.
The Secret to Clean Stitching: Manual Underlay
Free tools won't auto-apply this. You must add it yourself.For a Fill Area: Duplicate your shape. With the duplicate selected, go back to
Paramsand assign it as a "Running Stitch" or "Zigzag" stitch. Set its density to be much wider than the top fill (e.g., 2mm spacing). Change its color in Inkscape to help you visualize. This layer will sew first, stabilizing the fabric.For a Satin Column: Create a center line or edge line running stitch underneath it.
Export Your XXX File:
Go to
Extensions > Ink/Stitch > Embroiderto preview.In the Export tab, choose "Singer XXX" as your format.
Save the file to your USB.
Method 2: The "Free-for-Now" Professional Trial
This method gives you a short window of access to industrial-grade tools, perfect for a specific project.
The Strategy: Use the 30-day free trial of Wilcom Hatch. Wilcom is an industry leader, and Hatch is their accessible, full-powered digitizing software.
The Workflow for Clean Stitching: Hatch’s auto-digitize is a strong starting point, but the key is using its professional tools the trial unlocks:
Easy Underlay Application: One-click underlay with proper settings.
Pull Compensation: A slider that automatically adjusts shapes so they sew out to the correct size, preventing distortion.
Stitch Simulator: Preview your stitch-out to check for long jumps or errors before you sew.
Export directly to .XXX format with perfect compatibility.
This method teaches you what professional digitizing should feel like and can produce exceptional, clean results for free during the trial period.
The Pillars of Clean Stitching (No Matter the Tool)
Start Simple: Choose or create designs with bold shapes, clear lines, and limited colors. Intricate detail is the enemy of clean free digitizing.
Density is King: Too many stitches (high density) make fabric stiff and cause puckering. Too few (low density) show the fabric underneath. For fills, 0.40mm is a universal starting point for stability.
Underlay is Non-Negotiable: This is the foundation. It anchors the fabric to the stabilizer, preventing movement and creating a smooth base for top stitches. Skipping underlay is the #1 cause of "homemade-looking" embroidery.
Stabilize Correctly: Even a perfectly digitized file will pucker without the right stabilizer. For woven fabrics, use tear-away. For knits and stretchy fabrics, you must use cut-away stabilizer. This is external to your file but critical for the final clean stitch.
The Critical Step: The Test Sew and Refine Cycle
Your first exported file is a prototype, not a final product.
Stitch on Scrap Fabric: Use the exact fabric and stabilizer combo for your final project.
Analyze with a Critical Eye:
Puckering? You need better/more underlay or less density.
Stitches Looping or Breaking? Check tension, but also consider if stitch lengths are too long for the detail.
Design Out of Shape? You need pull compensation (easier in Hatch than Ink/Stitch).
Go Back and Adjust: Return to your software, tweak your settings based on what you saw, and test again. This cycle is how you achieve cleanliness.
Managing Expectations: What Free Digitizing Can and Cannot Do
It Can: Produce clean, attractive designs from simple artwork. Teach you the foundational principles of digitizing. Be a powerful and rewarding hobby.
It Cannot (Easily): Faithfully reproduce complex photographs or logos with gradients. Perfectly digitize very small, detailed text. Match the speed and guaranteed perfection of a $30 professional digitizing service for a critical business logo.
Conclusion: The Path from Free File to Clean Stitch
Learning how to Digitize XXX Embroidery Files for Free with clean stitching is a journey of patience and practice. It rewards a meticulous, engineering-minded approach. By starting with the powerful free toolkit of Ink/Stitch, embracing the non-negotiable rule of underlay, controlling your density, and committing to the test-and-refine cycle, you can absolutely create wonderful, professional-looking embroidery without spending a dime on software.
The cleanliness of your stitch is a direct reflection of the care you put into the digital blueprint. Embrace the learning process, start with simple designs, and celebrate each clean, successful stitch-out. Your machine and your creativity are ready—now you have the free tools to build the perfect instructions to connect them.