Many homeowners first learn about roof leaks when they notice a water stain on a bedroom ceiling or smell dampness drifting down from the attic. In most of these cases, the source isn’t damaged shingles—it’s the chimney flashing. Understanding how to repair lead flashing around chimney areas is essential because flashing plays one of the most important roles in keeping water out. Lead flashing, known for its durability and flexibility, has been used on homes for decades, but even this strong material can weaken with age or harsh weather. The flashing sits at the intersection where the chimney meets the roof, and this connection is extremely vulnerable to wind, rain, snow, and temperature changes. When flashing pulls away, cracks, or corrodes, water finds a direct path into the home. What begins as a barely visible gap quickly turns into a leak that spreads behind walls, soaks insulation, damages rafters, and leads to mold growth. Repairing lead flashing at the right time prevents these issues and helps the roof maintain its structural integrity. Whether a homeowner is dealing with minor wear or significant deterioration, proper repair ensures the chimney area stays watertight and the risk of interior damage remains low. Lead flashing, when restored correctly, lasts for years and provides a reliable barrier through every season.
Why Lead Flashing Fails and How Leaks Start
Before learning how to repair lead flashing around chimney, it helps to understand why it fails in the first place. Although lead is strong and long-lasting, constant exposure to changing temperatures causes expansion and contraction. Over the years, this movement loosens the nails or sealant holding the flashing in place. Storms can lift edges, cracks can form in old mortar joints, and heavy snow can create downward pressure that shifts the flashing. Even small movements eventually break the watertight seal. Once the seal opens, rainwater travels beneath the metal and begins soaking the roof layers underneath. Sometimes the first sign of trouble is a faint dark spot on the ceiling or dampness around the chimney interior. However, leaks often start long before these symptoms appear. Water may pool beneath shingles, saturate insulation, or run along attic beams before showing visible damage. This means the leak is often much larger than it appears. Lead flashing can also fail when the chimney mortar begins to deteriorate. Gaps or cracks in the bricks allow water to slip behind the flashing and pool against the roof decking. Seasonal freeze-thaw cycles only make the problem worse, widening cracks and increasing moisture flow. No matter the cause, once flashing starts to weaken, water spreads quickly. That’s why early repair is so important. The longer flashing remains damaged, the more extensive and expensive the repairs become.
Inspection Steps Before Repairing Lead Flashing
A proper inspection is the first and most important step in understanding how to repair lead flashing around chimney areas. Rushing into a repair without confirming the full extent of the problem often leads to temporary fixes that fail again within a few months. A careful inspection always begins on the ground, looking for visible signs such as rusted flashing edges, lifted corners, cracks in the chimney mortar, or water stains beneath the chimney inside the home. The next step is climbing onto the roof to assess how secure the lead flashing is. Sometimes the flashing looks fine at first glance but hides gaps where it meets the chimney stack. Professionals gently lift the edges, check for separation, and examine the sealant around the metal. Lead flashing is installed in layers, including step flashing and counterflashing, and the inspection includes confirming these layers are intact. Inspectors also check nearby shingles, since water that enters through damaged flashing often spreads horizontally. They look for soft decking boards or signs of mold along the roof structure, which indicate the leak has been active for a while. Inside the attic, discoloration on rafters or insulation confirms moisture penetration. By inspecting both the chimney exterior and the roof interior, homeowners get a complete picture of the issue. This thorough approach ensures that when repairs begin, they address not just the flashing but any secondary damage that may have developed over time.
Understanding the Repair Process and What It Involves
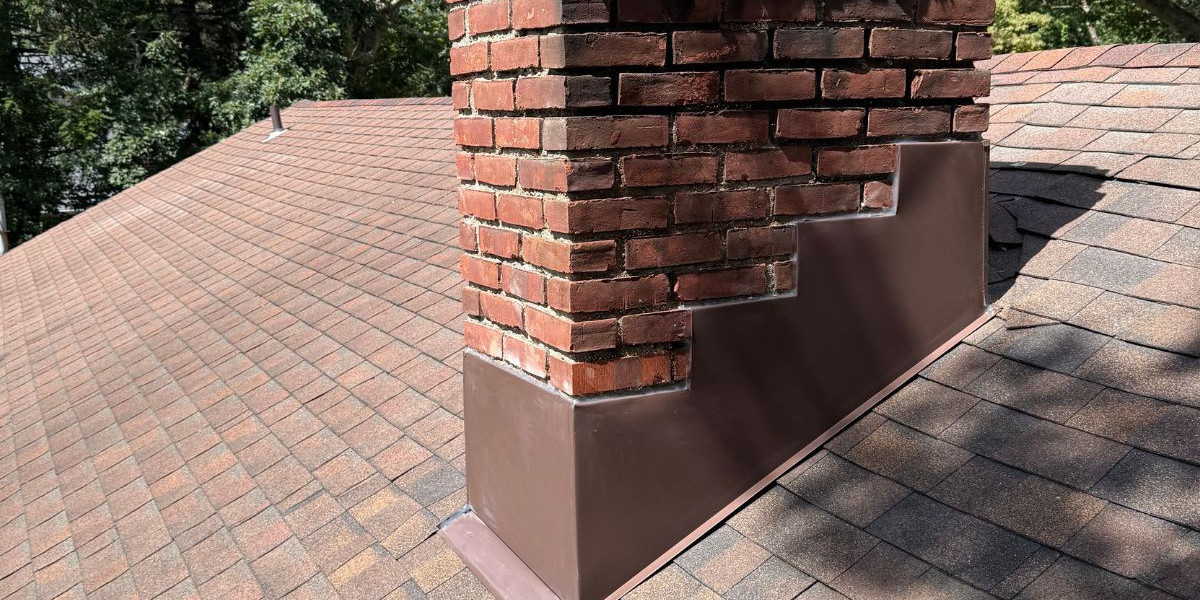
Once the problem has been identified, the next step is understanding how to repair lead flashing around chimney areas correctly so the fix lasts. The repair approach depends on the severity of the issue. For minor gaps where the lead has shifted slightly, the repair may involve repositioning the flashing and resealing it with high-quality roofing sealant. This quick fix restores the watertight connection but is only suitable when the flashing itself is still in good condition. For moderate damage, such as cracks or small tears in the metal, roofers often patch the flashing with additional lead or roofing cement. The patch must fully cover the damaged area and be shaped so water naturally flows away from the joint. More extensive repairs involve replacing entire sections of lead flashing. This requires cutting into the mortar joints, removing the old flashing, and installing new lead sheets that interlock with the roofing materials. The lead must be shaped to match the chimney structure, pressed firmly into place, and secured without causing stress that might lead to future cracking. Properly executed repairs also involve correctly installing step flashing under shingles and counterflashing over the lead so rainwater flows smoothly down the roof instead of into gaps. The final step includes sealing all joints and ensuring the flashing sits flush against the chimney. A well-done repair doesn’t just stop leaks—it strengthens the roof’s overall weather resistance.
Benefits of Properly Repaired Lead Flashing
Learning how to repair lead flashing around chimney areas brings long-term benefits that extend far beyond stopping a leak. When flashing is restored correctly, homeowners regain confidence knowing their roofing system is sealed tightly against rain, snow, and moisture. One of the greatest advantages of proper repair is preventing interior damage. Water entering through damaged flashing can rot wooden beams, destroy insulation, stain ceilings, and lead to mold growth. Fixing the flashing early prevents these problems before they become major restoration projects. Proper repair also improves the longevity of the roof. When water cannot penetrate the flashing area, shingles, roofing felt, and decking last significantly longer. A sealed chimney base also protects the chimney itself, preventing moisture infiltration that can weaken bricks and mortar. Homeowners also benefit from improved energy efficiency. Dry insulation performs better, helping regulate indoor temperatures and reducing heating and cooling costs. Additionally, professionally repaired flashing supports the home’s resale value. Buyers look closely at chimney and roof conditions, and a home with secure, well-maintained flashing signals responsible ownership. Instead of facing reduced offers due to water damage concerns, homeowners enjoy smoother transactions and fewer inspection issues. In the long run, quality flashing repair not only solves today’s problem but also protects the home for years.
Maintaining Lead Flashing After Repair
Even after learning how to repair lead flashing around chimney, maintenance remains essential. Lead flashing can last decades, but only if it receives periodic attention. Seasonal temperature changes cause the metal to expand and contract, which slowly shifts the flashing over time. Heavy windstorms may loosen the edges, while snowfall and ice can create pressure that weakens its connection to the chimney. After repairs, homeowners should check the flashing at least once a year, ideally during spring or fall. A quick visual check from the yard can reveal lifted edges or discoloration. After severe storms or heavy rainfall, it’s also smart to inspect the attic for any new signs of moisture. Early detection prevents small issues from becoming expensive repairs. Even if everything appears fine, professional evaluations every couple of years ensure the flashing remains sealed tightly. Maintenance also includes checking the chimney mortar because cracks in the chimney structure often affect the flashing’s performance. Keeping the chimney in good condition supports the flashing and prevents water from bypassing the metal entirely. With consistent care, repaired lead flashing can last many years without needing major work, keeping the home protected through seasonal weather changes.
Trust Ready Roof for Expert Lead Flashing Repairs
When homeowners want dependable workmanship and long-lasting results, choosing the right roofing team makes all the difference. Ready Roof provides expert solutions for chimney leaks and flashing damage, offering thorough inspections, precise repairs, and durable installations that withstand harsh weather. Their team understands how to handle lead flashing with proper technique, ensuring the repair addresses the true cause of the leak and not just the visible symptoms. With reliable service, transparent communication, and strong attention to detail, Ready Roof gives homeowners peace of mind knowing their chimney and roof are protected for the long term.